Hello everybody, I am really excited to finally have the courage to post a tutorial for you guys. This is my very first tutorial ever, so please bare with me on this one. I have so many teachers and inspirations that they don't even know that I am such a fan of them such as "The Sweet Adventures of Sugarbelle", " Arty McGoo", "Ali Bee's" and many others, and I am kind of nervous because I am not even close to any of their work, but I am learning as I go. Thank you so much and I really hope you guys like it.
I started really simple, with this wilton airplane cookie cutter, and this 3 flower cookie cutter from wilton also, notice I didn't make the flowers all the way, that's because I cut them so they looked as clouds, and I choose 3 different sizes to add the 3D look to them.
As you can see here, I am cutting the flowers so they can look like clouds.
Then I cut 2 of the same airplane cookie, one for the base and the other to also add the 3D look, so I choose just to add the wings and tale of the plane to them.
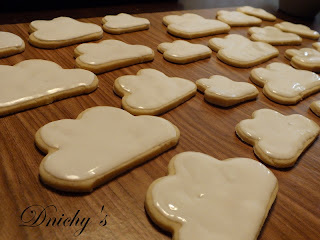
After baking them the next step was to add the royal icing to them, first outlineing them ofcourse. Do you see how pretty they looked?
Next, I cut a mini maeshmallow in 3 parts and I used them on the airplane cookie to add heigth to them. I recomend you to add the marshmallows while the royal icing still fresh, and use it as a glue.
Then I decide to add the propeller made out of black fondant, and I also outline them and add finishing touches with black food coloring, using a super thin paint brush.
And to finish the clouds I decide to stacked them biggest to smallest, while they were fresh with the royal icing also. After I used some blue disco dust to add some sparkle to them.
And here is how they looked!!!
I was super happy with the results, because they were a creation of my own, and my very first tutorial.
Thanks to my dearest friend Christina Shook Hendrick for her request on this wonderful cookies, I had a blast making them for her little boy on his 1st birthday!


Thanks for sharing the tutorial. You are truly creative!
ReplyDeleteAwesome! You are amazing!!
ReplyDeleteLOVED YOUR TUTORIAL...YOU GO GIRL.
ReplyDelete